
 |
| before |
 |
| after |
I scored these awesome Bentwood chairs from an Auction last year and I finally got the motivation to restore them for a Vintage Wedding photo shoot. (More about the shoot in coming weeks).
Unfortunately due to the horrible whether at the outdoor auction, the wood under the cushion got water damaged so I had to throw that part away and I replaced them with some ply wood that we cut our selves.
Below I will show you what I did to bring them back to life with a Quirky marshmallow touch!!! Enjoy the process and have a go at reinventing your own chairs.
 |
old cushions
|
 |
| wooden seat and cushion removed as water damaged |
 |
| sand off most of the black paint to expose the nice timber. Having some black paint left on the chair is nice, as it will add to the aged effect. (WARNING!!!! always wear a dusk mask and protective eye wear to prevent the horrible particles getting in your lungs and eyes!!) |
 |
| using a water based furniture paint, give the chair at least two coats (follow paint instructions for drying times) |
It's now time to distress the chairs to give them a old vintage feel. This is my favourite part!!!
 |
| Once the paint has dried, using a sander (I use a little mouse sander as it is so much easier then by hand, but you can do by hand), take off small sections of paint to expose the gorgeous timber underneath. |
 |
| Sand the paint off where the most natural damage would occur to a chair that has been used for 50 years |
 |
try to make each chair different to add to the illusion. I love how the black paint is coming through also as this adds to the aged effect!
 |
| yummy marshmallows |
|
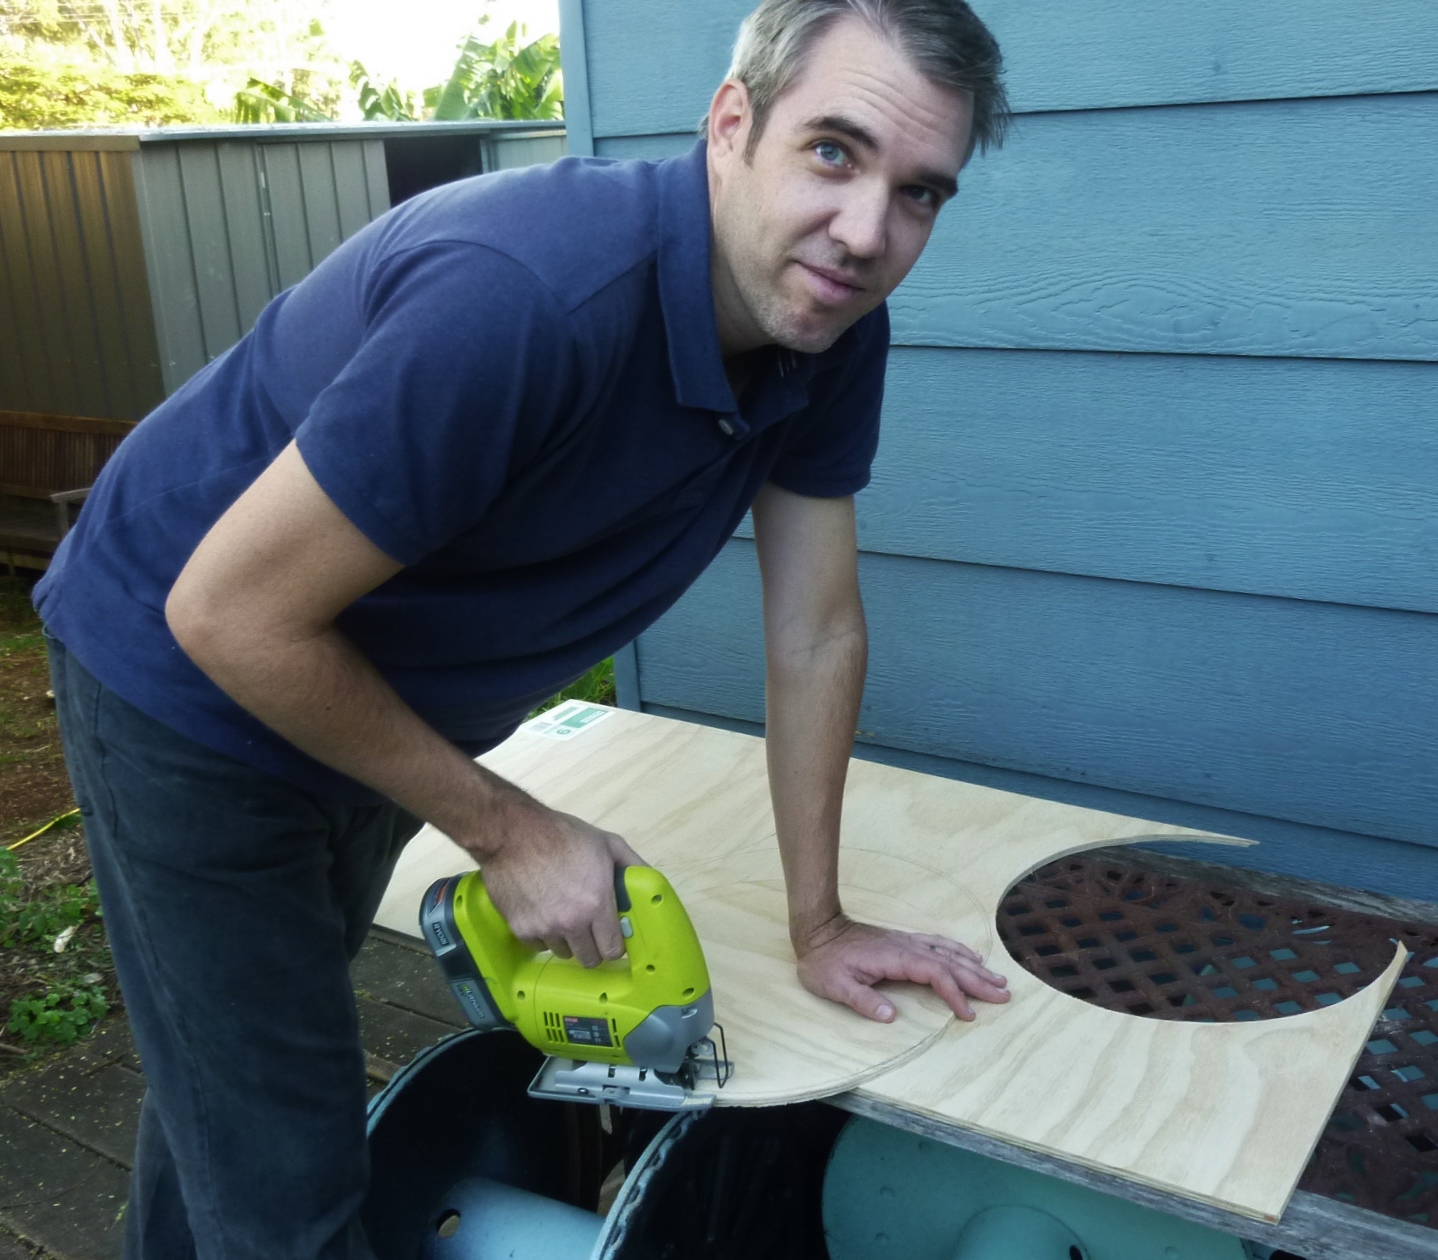
It's time to cut the new bases for the seat!! I am lucky/blessed/I scored for sure, to have a handsome/ sexy/adorable/handy man around to help with the not so girly jobs. Ross is cutting the circles out of ply wood using a jigsaw. By the way I can do this job, but I was painting at the time:) girl power!!
 |
| We drew around the seat we removed with pencil to get the circle size. |
 |
| after cutting out one circle make sure it fits perfectly and then use it to draw the rest of the circles onto the ply. Sand the ply. |
 |
| paint the ply in the original colour (black) so that it fits in with the chair. If you don't paint it then the seat will look like a fake!! |
 |
| once the undercoat is dry add two coasts of the colour to the seat |
 |
| seats painted |
 |
| now distress them to match the rest of the seat and add to the aged vintage effect. |
 |
| take the paint off where a persons bottom would sit and around the edges where it would get damaged |
 |
| distressing seat |
 |
| my marshmallows are finished |
Send me your chair makeovers so I can share them with the world!!
Cheers Banana ears (no you don''t have banana ears!)
Leis


They looked fantastic! Great job! xox
ReplyDeleteThanks Gillian!!! Almost as good as your cakes:) xx
DeleteWow! Great work there. I really liked how you have used different colors to paint them, which made them look even more beautiful.
ReplyDeleteThanks so much Sarah. Do you do any restoration or make overs on your furniture? Would love to see them if you do. You can now hire these beauties for your next event. It's great having you drop by my blog. Look forward to seeing you around more. Sign up on the right hand side by email so I can keep you up to date on other DIY projects. Leisa. Xx
Delete